


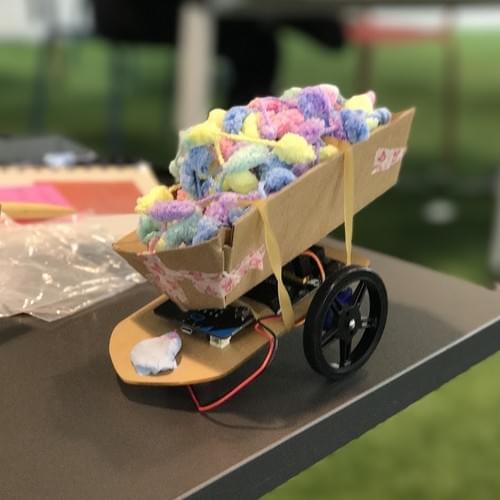
Little Fire Microbits Car
Connect the motor driver board to the Micro:bit using jumper wires. Refer to the pinout diagram for the Micro:bit and the motor driver board.
Connect the DC motors to the motor driver board using jumper wires. Be sure to connect the wires to the correct terminals on the board.
Attach the wheels to the motors.
Power the Micro:bit using the battery pack.
Write the code to control your car using the Micro:bit's programming language, either using a web-based editor like MakeCode or a text editor like MicroPython.
Test your code and make adjustments as needed.
Once your car is working, you can add additional features, such as sensors or LEDs.
Materials:
- Micro:bit board
- Micro:bit battery pack
- 2 small DC motors
- Wheels for the motors
- Motor driver board (such as L293D)
- Jumper wires
- Chassis or materials to build one (cardboard, plastic, 3D printed parts, etc.)
- Screws, nuts, and bolts (if building a chassis)
Steps:
Begin by assembling the chassis or structure for your car. You can use cardboard, plastic, or 3D printed parts to create a frame. Make sure to leave space for the Micro:bit and battery pack.
Connect the motor driver board to the Micro:bit using jumper wires. Refer to the pinout diagram for the Micro:bit and the motor driver board.
Connect the DC motors to the motor driver board using jumper wires. Be sure to connect the wires to the correct terminals on the board.
Attach the wheels to the motors.
Power the Micro:bit using the battery pack.
Write the code to control your car using the Micro:bit's programming language, either using a web-based editor like MakeCode or a text editor like MicroPython.
Test your code and make adjustments as needed.
Once your car is working, you can add additional features, such as sensors or LEDs.
With a bit of creativity and experimentation, you can create a wide range of Micro:bit cars with different shapes, sizes, and features. Some examples of Micro:bit cars include line-following robots, obstacle-avoiding robots, and remote-controlled cars.